Archive for the ‘Recipes’ Category

Quick and Yummy Cinnamon Apples!!!!

Fall, apples and cinnamon just seem to go together.

Somewhere along the way I happened upon this method of cooking cinnamon apples.  It is super, super easy way to prepare them and is a family favorite.

I try to keep a package or two of these in the pantry.

WP_20141024_003

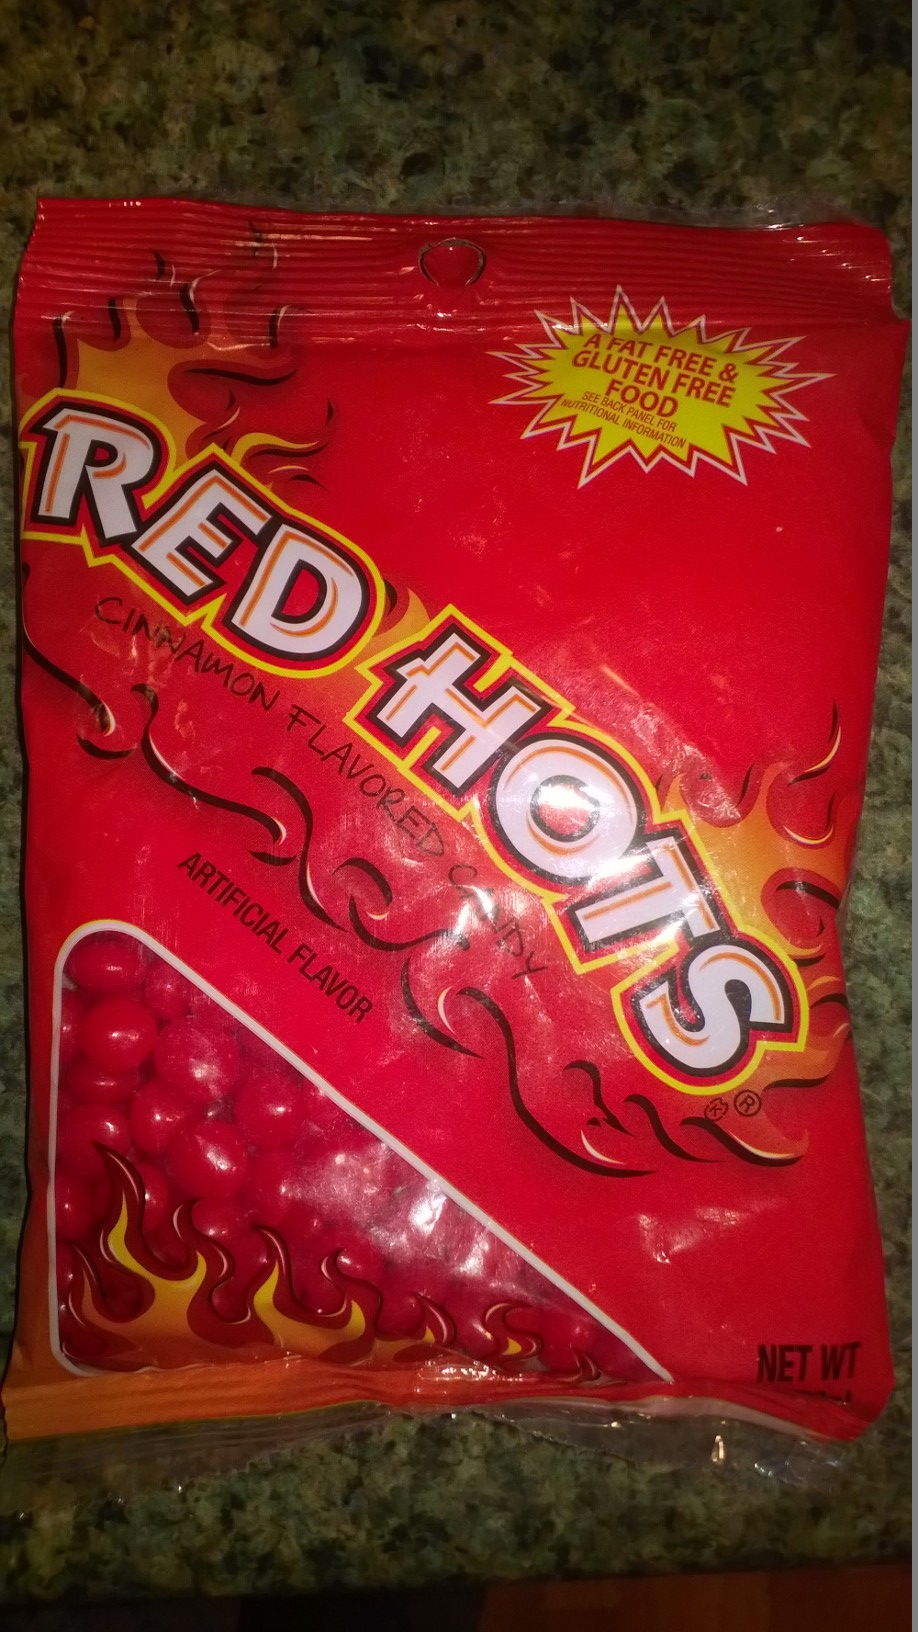
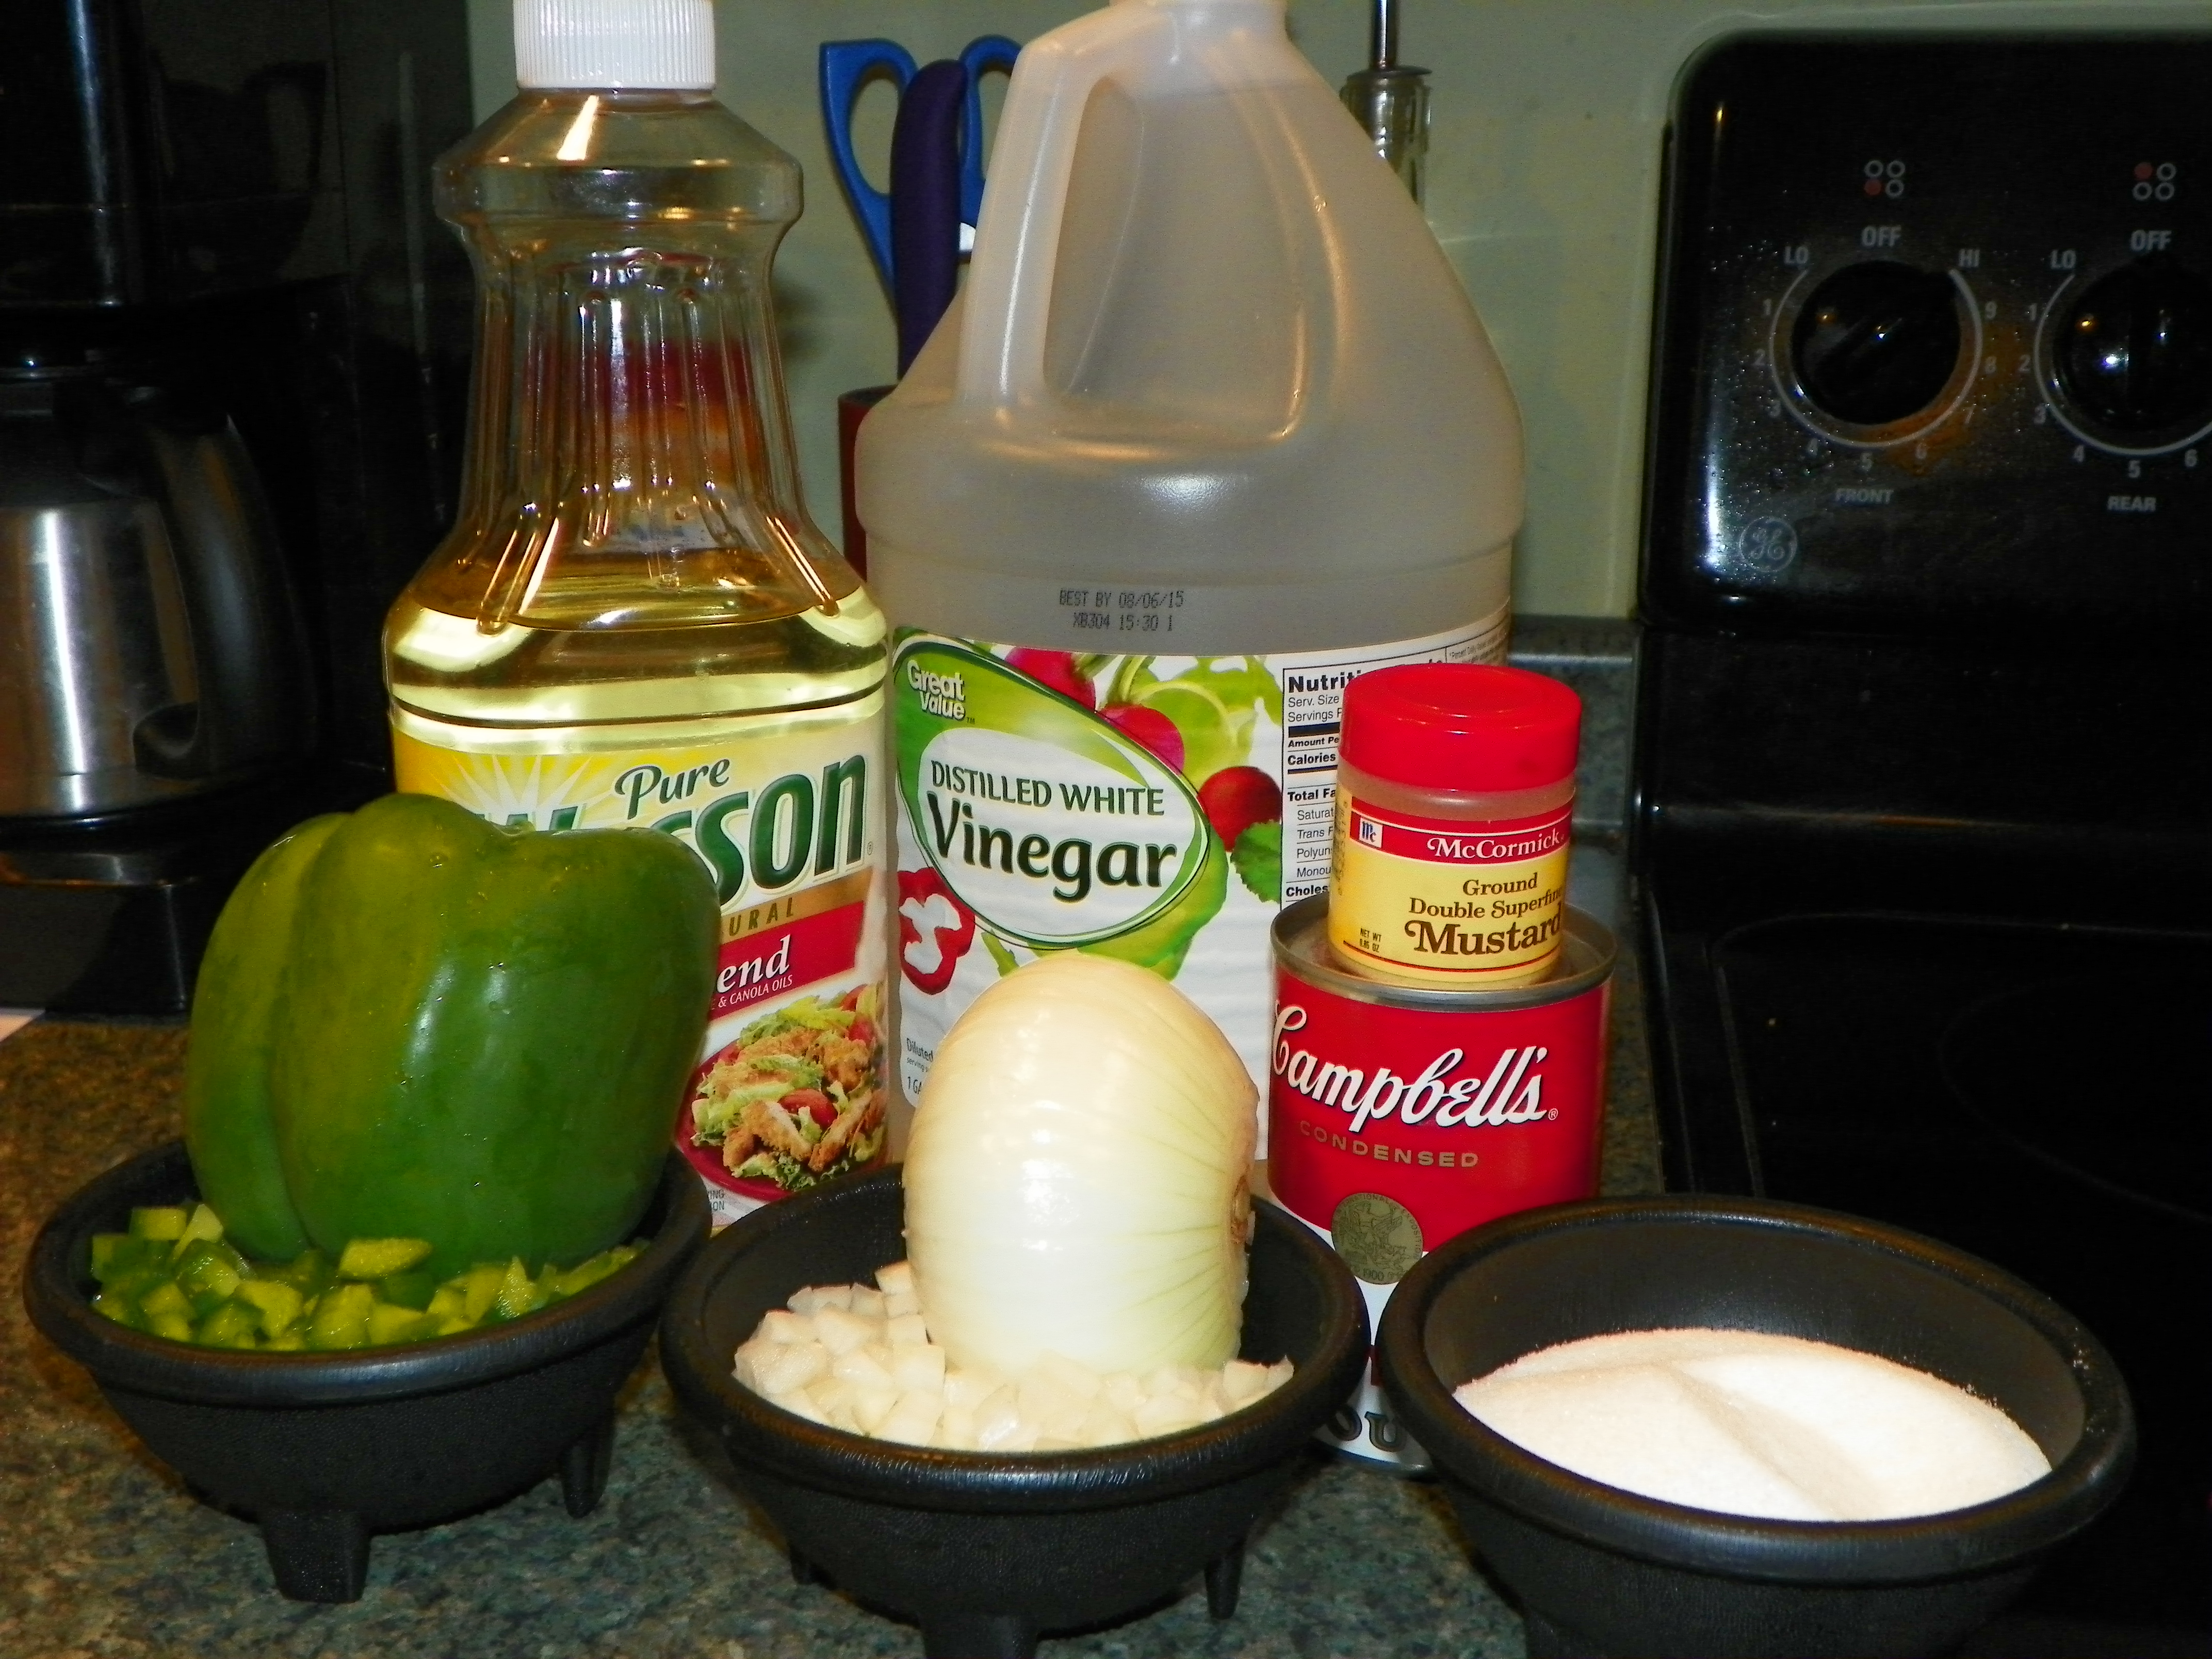
This is either a 6 or 8 oz package.   I usually pick them up at the Dollar Tree Store.  I favor this brand because they are flavorful, some others I tried weren’t as good.

I usually have a couple of apples on hand,  I use the Gala apples a lot.  They are good to eat uncooked and the also cook well.

Which ever apples you choose just make sure it is one that cooks well, or it will tend to be mushy.

However, maybe that will just be a new recipe….homemade cinnamon apple sauce 🙂

I cooked these the other night for dinner.  It was just the hubby and I so I only cooked about 2 apples.

WP_20141024_004

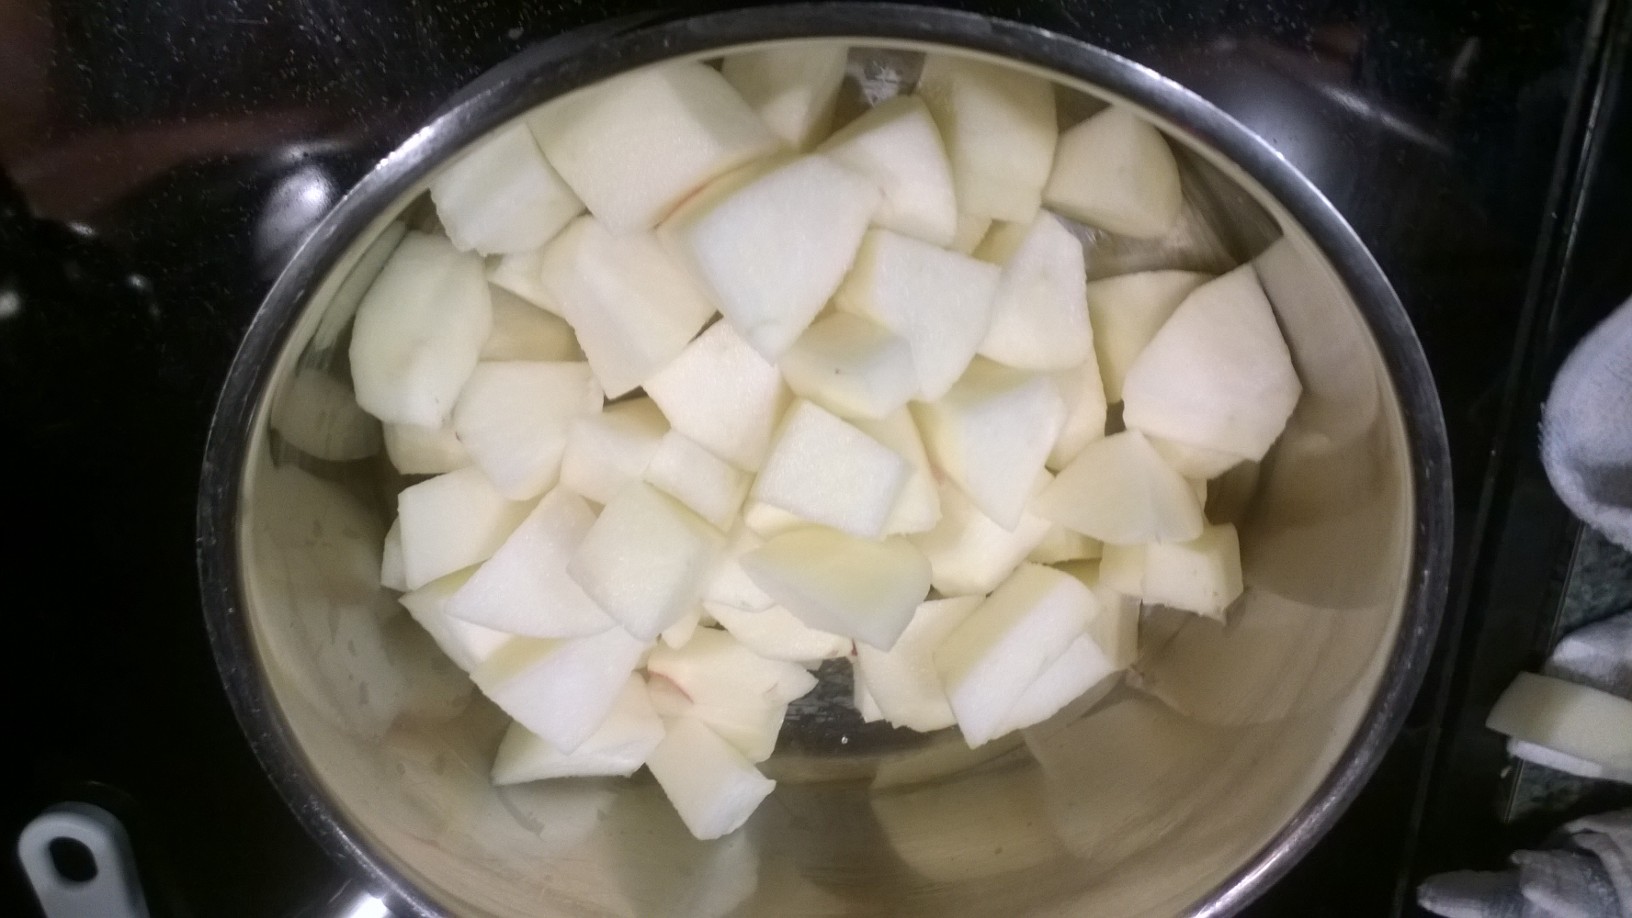
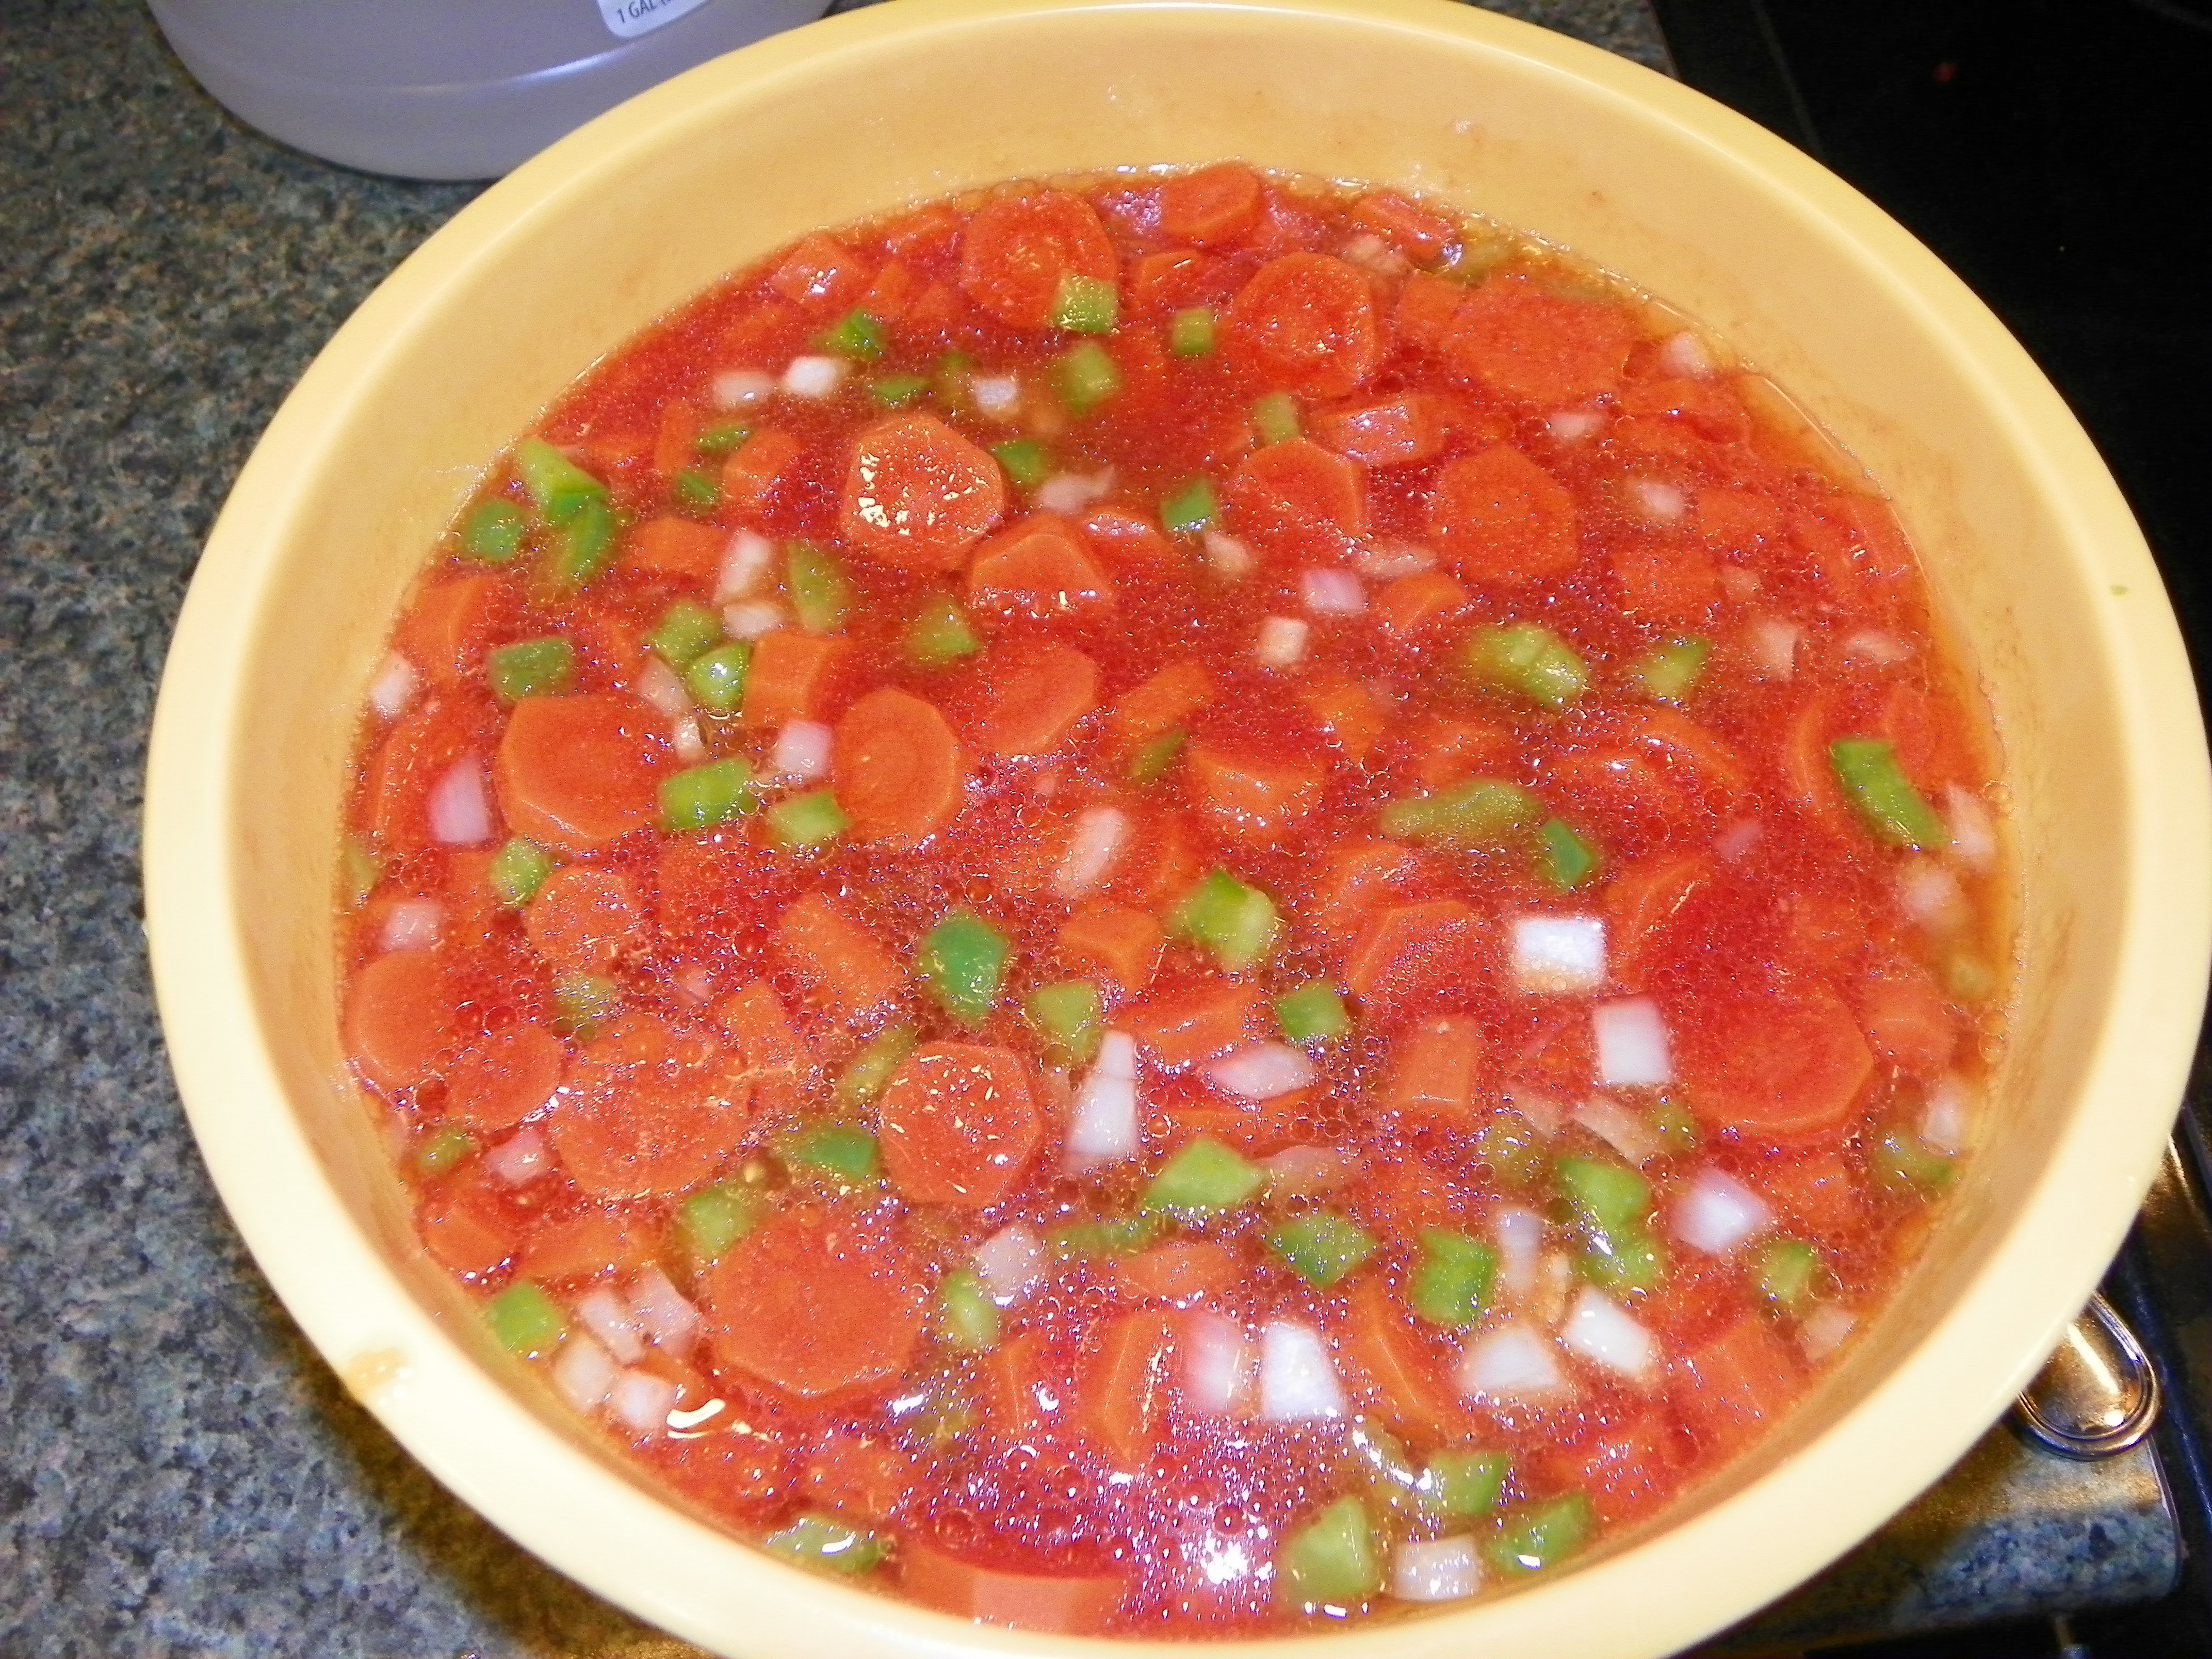
I peel the apples and cut them into uniform bite size pieces.  It doesn’t really matter what size, but you do need to keep them close to the same size so they cook evenly.

Place them in a boiler big enough for the amount you are preparing, and allowing for juice.

WP_20141024_005

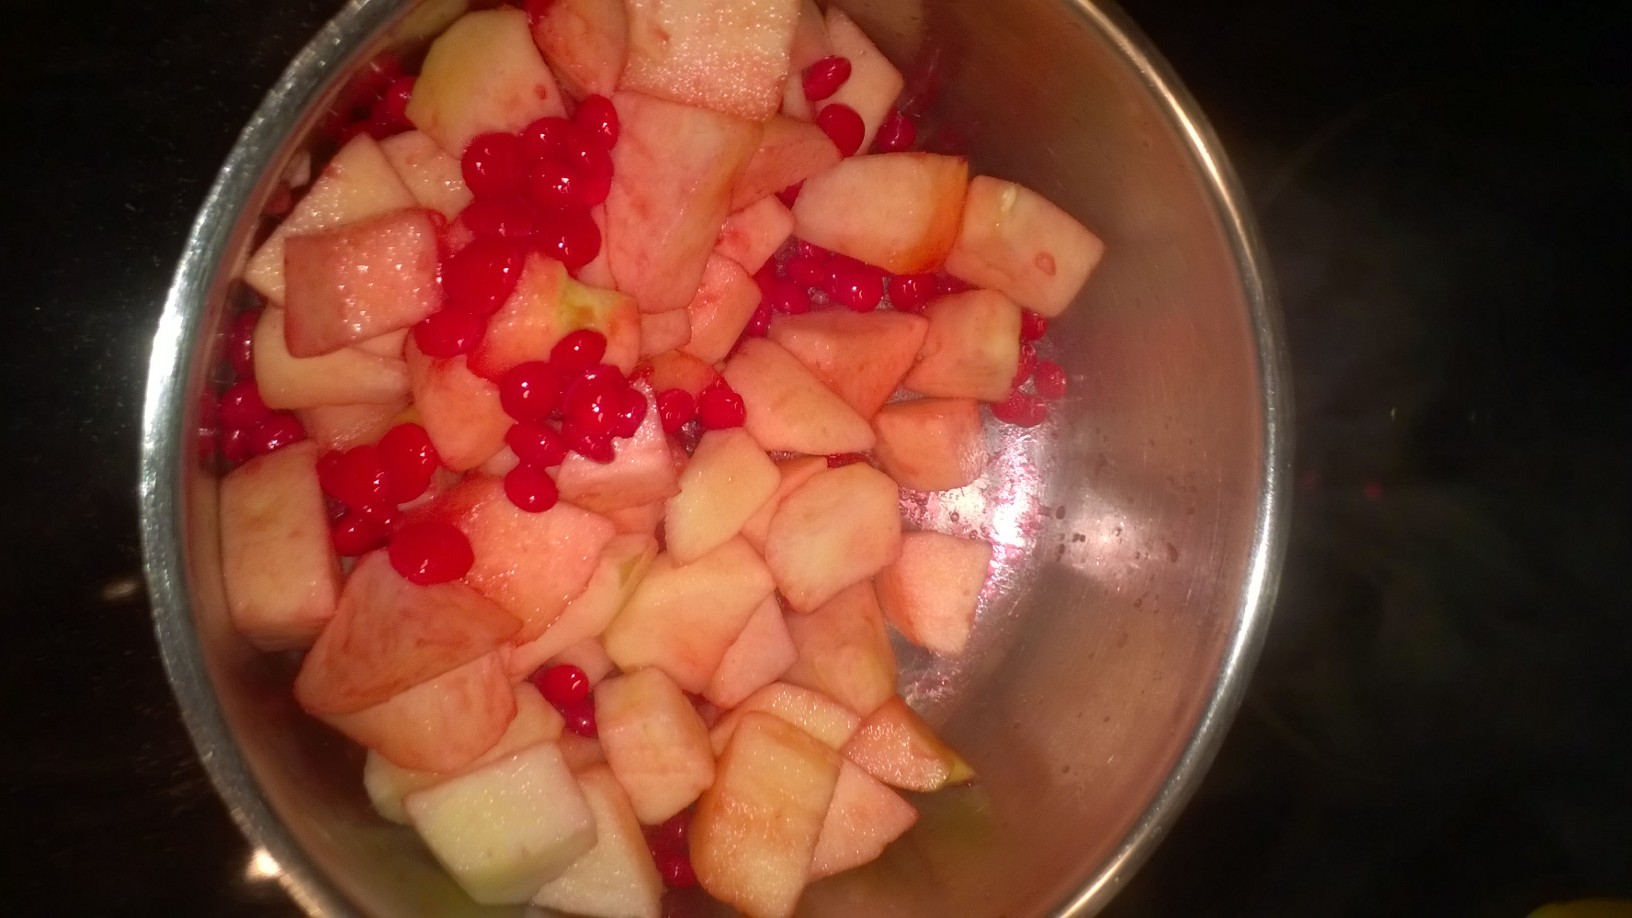
Sprinkle a few red hots in the pot with the apples.  On this day I only used about 1/3 of the bag because I didn’t have many apples.  When I cook a pot full of apples 6 to 8 or so, I use the whole bag of cinnamon candy.

That is it.

…….NO WATER…..

I turn the heat to medium and let it do its thing.

WP_20141024_006

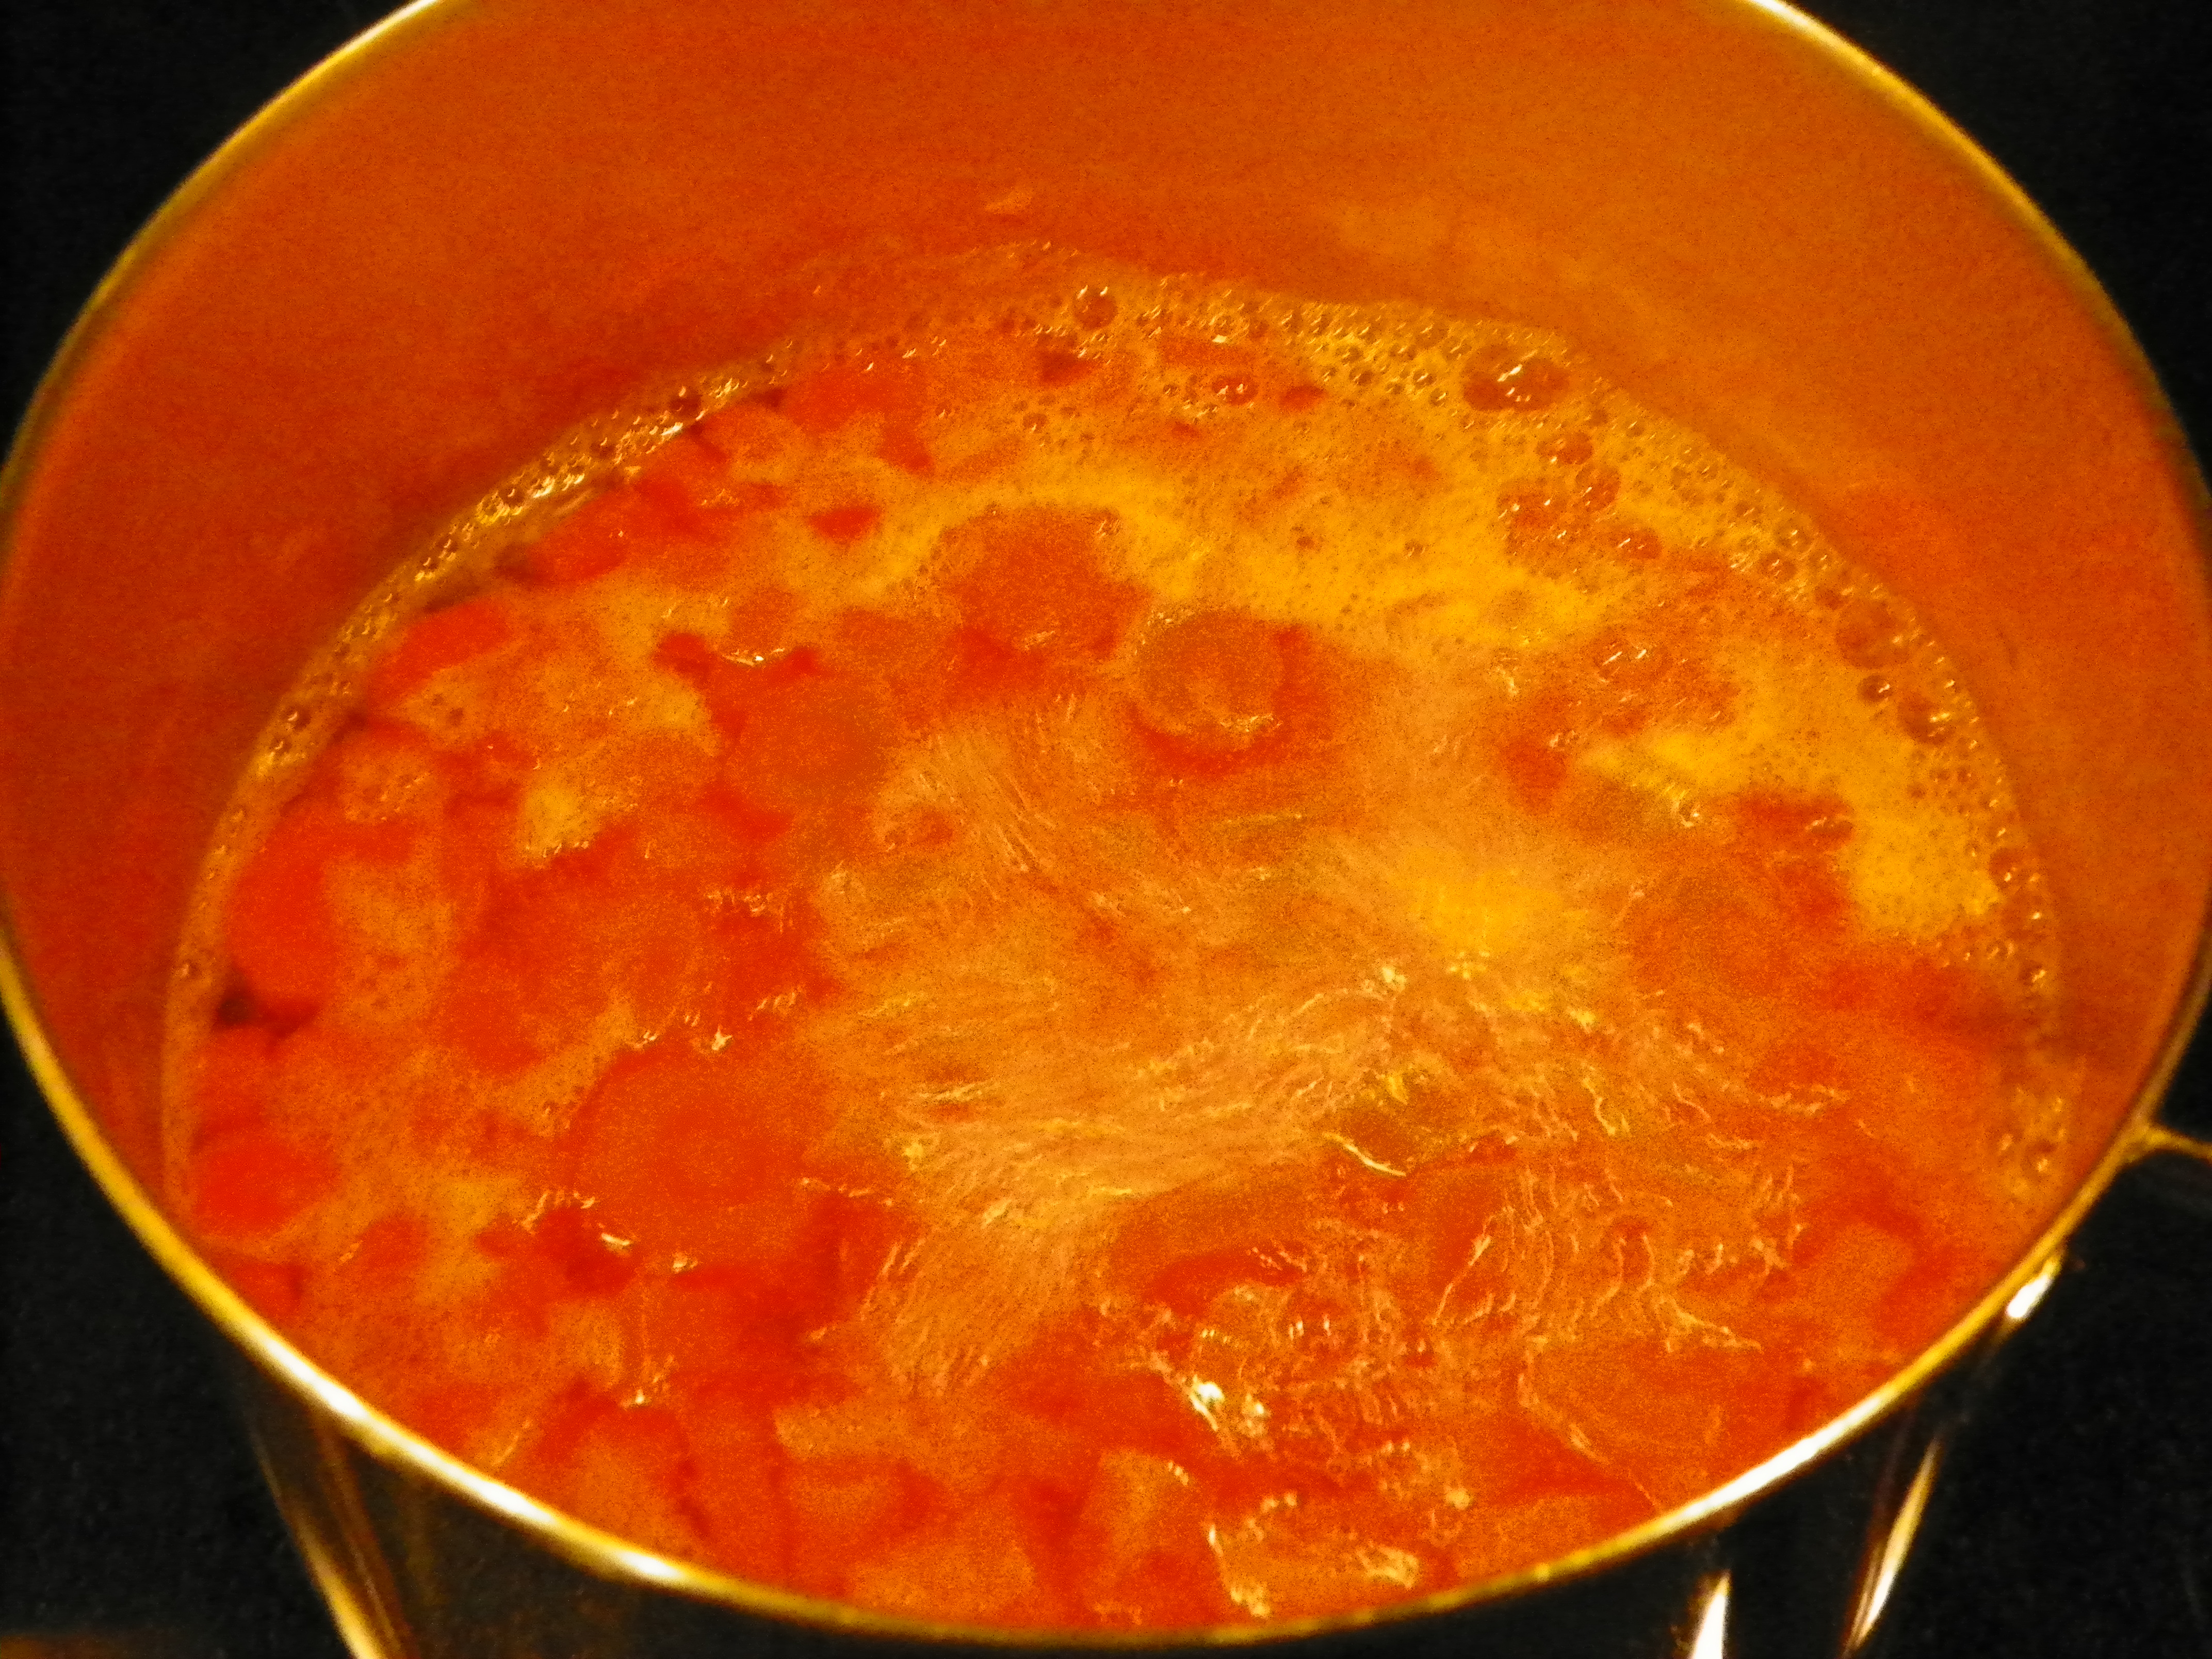
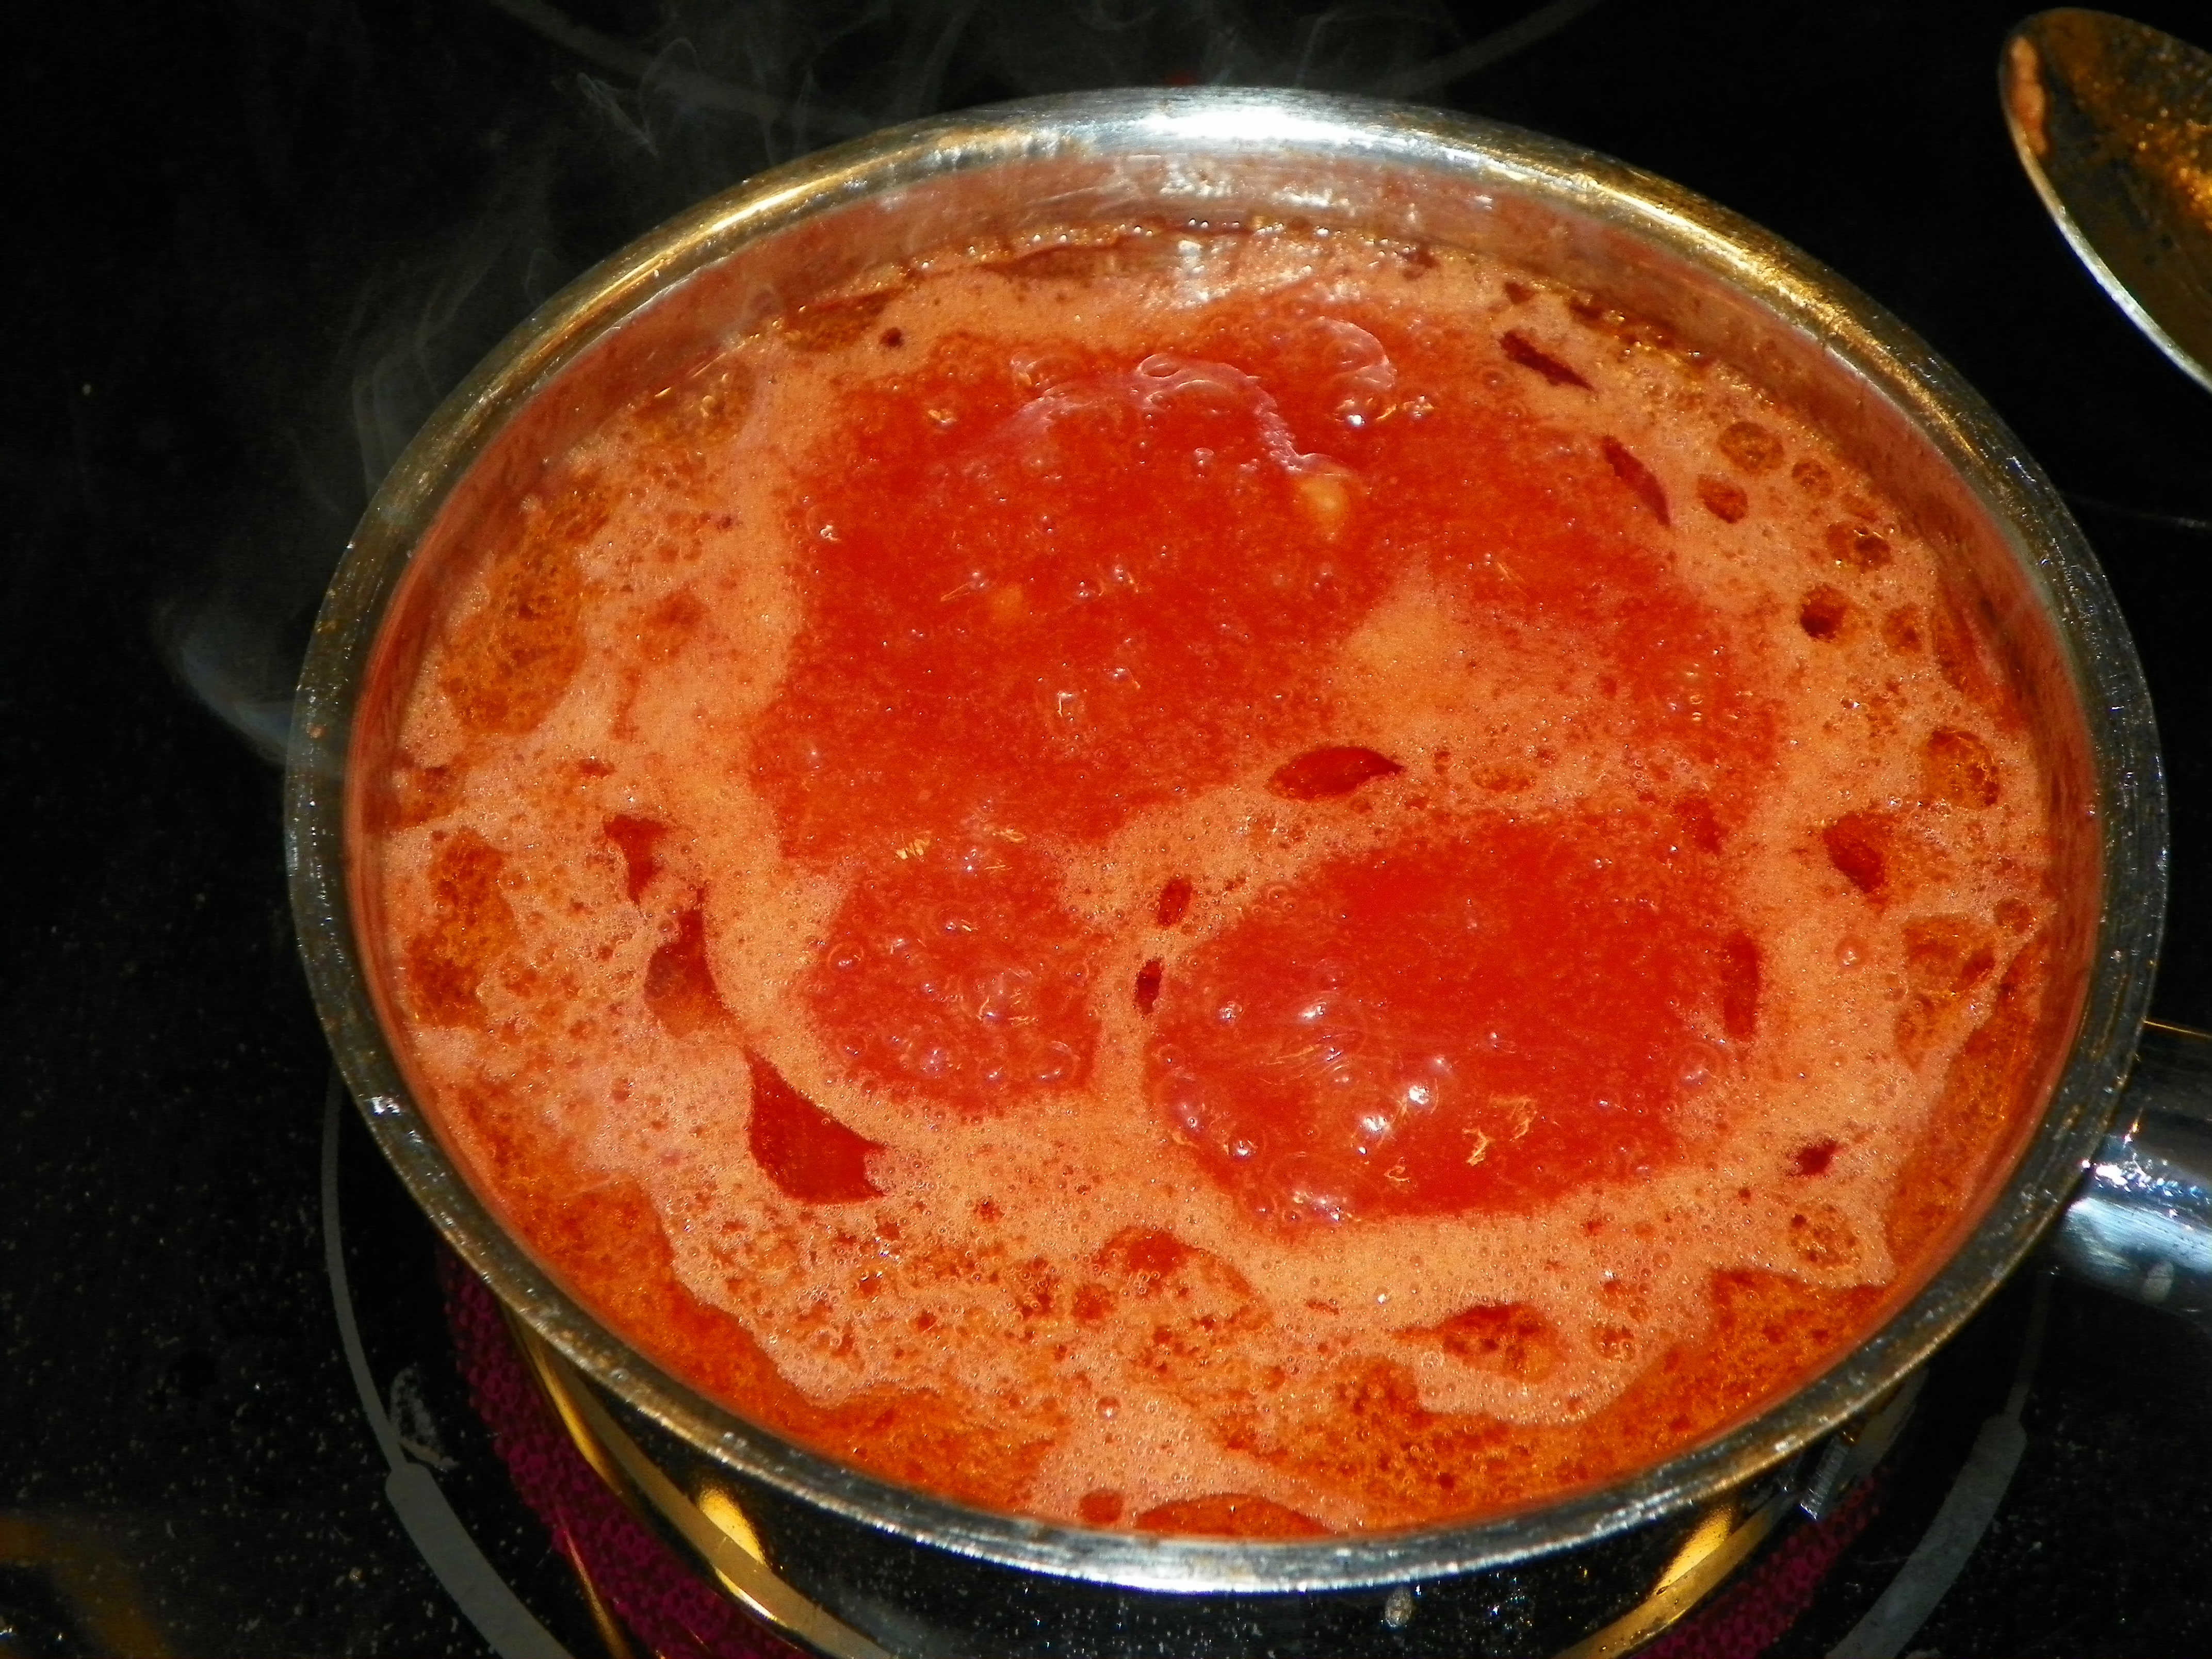
The apples will start to cook and release juice.  The candy will melt.  I do stick close to the pot, stirring pretty frequently so the candy doesn’t stick to the bottom of the pan.  The whole process only takes about 5 minuted.  Of course if you have more apples it may take a little longer.

WP_20141024_007

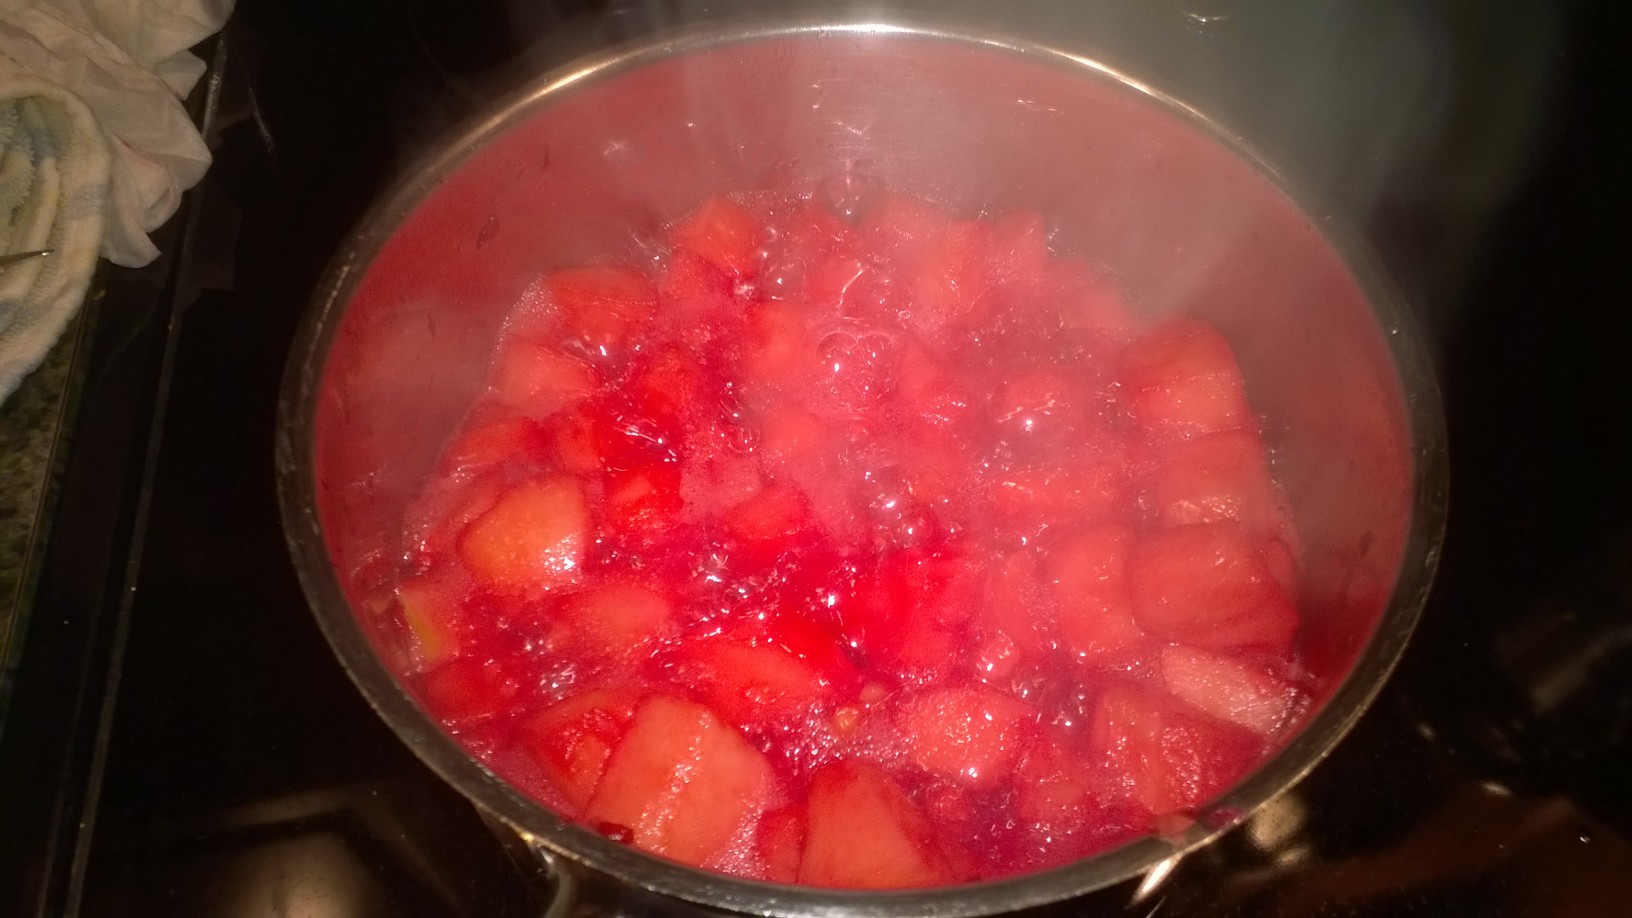
It is amazing how much juice you end up with.

On occasion I will have a few red hots stick to the spoon.  No problem….just let the spoon rest in the hot juice for a little while and it will dissolve.

They are ready when you reach the tenderness you desire.  Watch carefully though because it doesn’t take very long.

Once you have cooked these a time or two, you will be a pro.  You will know how much of the candy you prefer to use and the amount of time to cook them.

I love that they are flavorful and super easy.  They do not require a lot of prep time or cook time.  I usually have the meal almost done before I even start cooking these because they cook so quickly.

On this night we had them with chicken and dumplings.

We eat them hot, but I have been known to eat them the next day straight out of the fridge.  They are good both ways.

With Thanksgiving coming up, this is one recipe that doesn’t cost much, is easy to prepare, is yummy and makes the house smell fabulous.

I hope you enjoy them as much as we do.

Copper Pennies

Billy really loves these, I just forget to fix them very often.  It is a simple recipe and not time consuming.

100_6709

Ok…so I forgot to put the carrots in the picture…sorry….but here are the other ingredients.  (Just be sure you have carrots when you get started!)

2 pounds of carrots

1 onion chopped

1 green bell pepper chopped

1 can tomato soup

3/4 cup white vinegar

3/4 cup sugar

1/2 cup vegetable oil

1 teaspoon dry mustard

Peel and slice carrots, boil until just tender.

100_6708

Drain water.

100_6710

Add chopped onion and bell pepper…..

100_6712

Mix soup, sugar, vinegar,oil and dry mustard.  Bring to a boil.

100_6713

Pour boiled mixture over carrots, onion and bell pepper.

100_6714

Marinate overnight…..

100_6717

I store mine in jars for easy storage, they will keep for up to four weeks in the refrigerator.  (This is not canned and has to be refrigerated)

You can serve them cold, warm or hot.

Apple Pie

This time of year there are fruit stands with beautiful baskets of apples all along the county roads.    I knew I was getting close to one the other day, as I drove down the road…. I found myself having a mental conversation.

Oh….I think I will stop and see if they have apples….

No…I don’t need to buy a bunch of apples….

Oh…I bet they do…I bet they are really good this year….

Maybe I will just pull in and look…..

Sooooo……

I purchased some apples from the fruit stand the other day……

My thoughtful mother in law sent some apples home with Billy the same day.   But the really good part of that is…we really like apples and we had different kinds!!!!  So, since I have made….PLENTY….. of Jelly….this summer….I decided to make a pie.

I found out that my sweet Aunt makes an apple pie about once a week for my Uncle.

I thought that was soooooo sweet.

She was gracious enough to share it with me….also stating that it was really easy….

A pie that taste good and is easy….now that is right up my alley!

Here is her recipe…..It’s GOOD…..Really, Really GOOD!

6 Cups Apples-(Granny Smith)

1 Tablespoon lemon juice (optional)

3/4 Cup Sugar

2 Tablespoon Flour

Cinnamon to taste….I used 1 teaspoon

1/2 Teaspoon Nutmeg

1/2 Cup raisins (or dried cranberries or chopped walnuts)

Pastry for double crust—or you can just use top crust.

Here is a beautiful Granny Smith apple my mother in law sent our way…..

This is one of the Golden Delicious apples that I bought…….I decided to try both kinds.

My Aunt lives a LOOOOOONG way away from me….so she couldn’t show me how she does hers.  I am sure she does a MUCH better job and has it down to a fine art if she is making one a week…..

This is how I decided to go about making mine…..with her recipe

One time I saw a picture of a pie cooked in a skillet…since we live in the country….I gave it a whirl.

I do not make pies often….obviously….so I bought my crust.  I knew it would have to taste better than me making my own.  Besides, I didn’t want to waste those good apples on a bad pie!

I melted some butter in the bottom of my skillet, it just looked like it needed some good ole butter in there……then I placed the first crust down….

Mixed all my ingredients and placed them on top of the crust.  Billy chose walnuts to go with his apples….

After I put the top crust on I brushed the top with egg white and made a few slits.  I cooked it for about 1 hour and covered it with foil the last 10 minutes so it wouldn’t over brown.

YUMMMMY….it smelled so good cooking!

Who can wait until it cools….I cut us a piece and topped it with Vanilla Ice cream…

I served Billy and went to get the camera so I could get a picture of him and his beautiful slice of pie….a la mode….

When I returned….and I was only gone for a minute….it was pretty much GONE.

So this is the only picture I got….

It is safe to say…….. he liked the pie!

I said…. well…. Billy!…..I sat the camera down and inhaled mine as well….so still no picture!  Oh, well…..

Thank you Aunt Janet…..it was VERY, VERY, GOOD.  I think I shouldn’t tell Billy that some people get a homemade pie every week……If you know what I mean!!!!!

Oh….and Uncle Pat…..you are a very blessed man!

This saying came to mind…..

Anyone can count the seeds in an apple, but only God knows how many apples are in a seed!

Apple Cake….YUM

It is beginning to feel like fall around here.  The mornings have been cool this week.  It is bittersweet for me.  I must admit, I have enjoyed the brisk air… in the mornings…and a little while in the evenings….but I am not a cold weather person.  Once the cool air starts creeping in, I kinda get an …..awwwww man attitude.  I know that the warm days are about to disappear for months.  Which means layering clothes……wearing sweatshirts and jackets.  UGH.

Some of the good parts of fall are the apples, pumpkins, sweet potatoes and all the upcoming holidays.

I had a few apples around and we had eaten all the raw ones we really wanted lately.   Sooooo I remembered a recipe that my Mom had passed down to me.  It came from a lady that was in the home town she grew up in.  This morning I quickly retrieved it from my recipe file box and hurried to make it before work.

I peeled a couple of apples…I have discovered in the last year or two…perhaps you figured this out longggggggg ago…that a vegetable peeler works great for peeling apples.  I have always used them for carrots, potatoes and cucumbers.  Maybe I am just slow…in life.  But this way is much faster and it cuts so close to the skin that it keeps you from wasting the inside of the apple.  I couldn’t remember how many apples I would need, but I ended up only using about three.  It depends of course on how big your apples are.  But you don’t need to buy a bag by any means to try this.  Chop your apples in somewhat small pieces.  Try to keep them all about the same size too.  They will cook uniformly that way.

I say all that as if you don’t know.   But sometimes I look at a recipe and …”I don’t know”…and wish they would be more specific.  So now you know, and you won’t have to wonder.  (Also when Billy and I first married I wanted to make him an apple pie.  I was so proud of myself.  It smelled wonderful in the oven…he was sooooo excited.  I cut it and served it with some vanilla ice cream…we dug in.  It was then that I realized that I never peeled the apples.  WELL….the recipe didn’t tell me too.  I was so busy making sure I did everything perfectly that it just slipped my mind.  I wove the pie crust on the top and punched the edges together and all that.  It was beautiful….but……it wasn’t very good.  It was hard to get past the peelings…other than that it had good flavor.  It is one of those things that you laugh now…but it wasn’t real funny then).

Anyway…

I found this little chopper at a yard sale this summer.  My Mom had one when we were growing up.  It seems they kinda disappeared as people began using food processors and all those BIG gadgets.  I usually cut the pecans by hand…but today…I chopped them in my new/used handy dandy chopper!  Waa Laa they were chopped in seconds…literally.

I have some little loaf pans that I like to use for banana bread and recipes like this.  I actually have never made it in any other pan.  These work great for us, it allows me to be able to wrap them up and give them away easily.  Beside,we don’t need to eat that much by ourselves!

Sometimes…like today…after I sprayed my pans, (or wipe them lightly with oil) I sprinkled a little mixture of cinnamon and sugar in the pans.  Just enough to lightly dust the bottom.  This just gives it a little more ummph.  But you do not have to do this.  The recipe doesn’t say to do it…it is just something I do sometimes.

The mixture will be thick.  When I add everything together, before I put in the pecans…I give it just a swirl or two with the mixer to make sure it is mixed real good. Another thing the recipe doesn’t specify to do.

I ended up with 7 miniature loaf pans.

DONE…..Oh my word….it smells sooooo good!

I popped one out and cut it when it was fresh out of the oven.

You know…I just had to make sure it turned out alright….

The picture doesn’t do it justice.  The slice already has butter….melted all into it.  Billy and I love to eat these loaves like this.  No matter if it is banana bread or whatever it is….when it comes out HOT….we put butter on it and inhale it.

Here is the recipe:

Apple Cake

3 cups sugar

1 1/2 cups oil

3 eggs

2 teaspoons vanilla

Mix that together real good in a large mixing bowl

3 Cups plain flour

1 teaspoon soda

1 teaspoon salt

1 teaspoon cinnamon

Mix in above mixture

then add:

3 cups apples

1 cup pecans

Bake in a 325 degree oven ( Moms recipe called for 1 and 1/2 hours…so this is for a regular cake…maybe like a bundt pan or something)

I cooked my little loaves for about an hour.

HOPE YOU TRY IT THE NEXT TIME YOU HAVE  A COUPLE OF APPLES AROUND….It’s Yummy!

ENJOY

Peanut Butter Apple

I love this idea.  I did not come up with it on my own.  I believe I was in 7th grade when a girl named Susie brought one of these in her lunch.  I was totally amazed.

It is easy to do….and great to pack up for on the go.

Pick the apple variety you like best.


Get a good sharp knife…..


Cut around the core …I usually make a square…sometimes if it is stubborn I turn it over and cut from the bottom side as well.


Push on the core and…….Wah…Lah!!!


Fill the center of the apple with ….Peanut Butter.


Now isn’t that neat.

You can pack it up easily…to take in the car for later…a picnic…or kids lunches.


I find that I eat apples a little more this way.  I like getting that little bit of peanut butter with  a bite of apple.

Anyway, that is something I thought you might like to try if you haven’t already.

Oh….and thank you Susie’s Mom!!!!


Hot Corn

Is your family like ours?   If you make a dish and it ends up being a “keeper” then you start getting asked to bring it to the next family function.  I like that.  It sure makes it easier to know what to take….and it makes you happy that everyone likes it that much.  This is a recipe I first made about 15 years ago.  All of my family…except me…love foods with a “bite”.    So if you want something super easy to make and yummy to the tummy, then you will want to try this.  I can almost guarantee that you will get asked for the recipe or asked ….as we country folks say….”fix it”….again.  It is spicy…but you can control how much heat you want by adjusting amount of the jalepenoes

This is what you will need.

4-Cans of White Corn (Shoe Peg)

1 -Stick of butter

1 -8 oz package of Cream Cheese

1/4 Cup Milk

2-Tablespoons Jalepenoes – chopped

If using canned corn, drain the juice.  I usually cook my corn in a crock pot.  But if you want to cook  it in the oven you can do that too.   (If using oven pre-heat to 350 degrees and cook until bubbly.  approx 25-30 minutes)

Next:

Melt Butter and Cream Cheese in a medium saucepan.  Add 1/4 Cup  milk.  Stir well and bring to a slow boil.  (Just watch it carefully, you do not want it to scortch)

This is when I put it in the crockpot and stir it all together.  (I know….the pot doesn’t even look full…but this usually feeds about 12 people or so.)  You can always double the recipe if you like….I never have, everyone seems to eat enough.

I often Amaze …and amuse…myself.  I have learned to “rig” the lid like this.  A rubberband around the handle on one side and over the top knob.  Then do the same on the other side….then I tuck the cord up under the rubber band and —-Woo-hoo!  It travels well in the floor board…it arrives safely -usually no spills– to wherever it is you are going…and you won’t smell corn in your car for a month!

A side note to this is:  The original recipe called for 3 small cans of shoe peg corn.  This is sometimes hard to find…a lot smaller can….but more than that….they are expensive.  So, I look for white corn (The white corn does taste different than the yellow).  I use 4 regular sized cans, however, they still cost more than yellow corn does.  I was able to find frozen white corn and it was shoe peg  this time.  It did just fine and was about half the cost, believe it of not of the cans.   So I will be using that whenever I can find it.  I did put the corn in the crock pot and let it get warm first, then I poured off most of the juices that came from it being frozen.  Then I proceeded as usual.

One more thing…..Be sure to tell people that it is “HOT CORN” ( It will be too hot more than likely for a child and adults who do not like spicy foods).